

50% off
Delivery Options
Choose pickup at our Nairobi store or select your county for courier delivery.
Pickup at RNG is always free. Select a county to compare courier rates.
Description
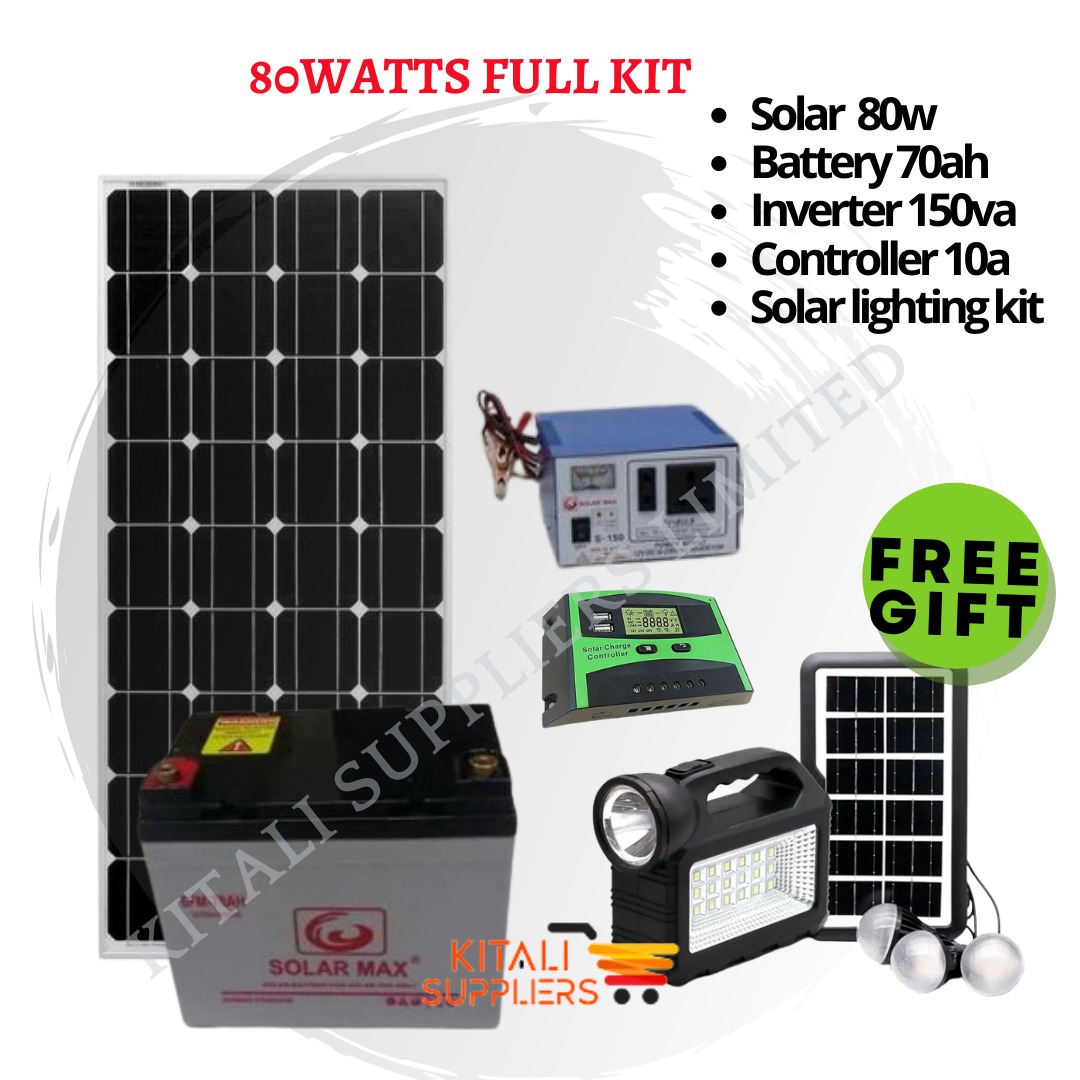
\nThe 80 W solar 150 VA inverter full kit is a complete package that includes an 80-watt solar panel, a 150 VA inverter, and all the necessary accessories for installation and operation. This kit is designed to provide a reliable and efficient power solution for various applications, such as camping, RVs, boats, and off-grid installations.
\n
\nThe solar panel included in the kit has a power output of 80 watts. It is made up of multiple photovoltaic cells that convert sunlight into electricity. These cells are typically made of silicon, which is a semiconductor material known for its ability to generate electricity when exposed to light. The solar panel is equipped with a junction box that allows for easy connection to the inverter and other components.
\n
\nThe 150 VA inverter included in the kit is responsible for converting the DC (direct current) electricity generated by the solar panel into AC (alternating current) electricity that can be used to power various devices and appliances. The inverter is equipped with multiple outlets or ports where you can plug in your devices. It also has built-in protection features to ensure safe and reliable operation.
\n
\nIn addition to the solar panel and inverter, the full kit usually includes other essential components such as mounting brackets, cables, connectors, and a charge controller. The mounting brackets are used to securely install the solar panel on a suitable surface, such as a roof or a pole. The cables and connectors are used to connect the solar panel to the charge controller and the inverter. The charge controller regulates the charging of batteries (if included) and prevents overcharging or discharging.
\n
\nWhen it comes to installing and using the 80 W solar 150 VA inverter full kit, it is important to follow the manufacturer's instructions and guidelines. Proper installation ensures optimal performance and longevity of the system. It typically involves mounting the solar panel in a location with maximum sunlight exposure, connecting the cables and connectors, and configuring the settings of the charge controller and inverter.
\n

Positive Seller Ratings
100%
Ship on Time
100%
Seller Reviews
0
0
Average Rating
(0 Review)
0%
0%
0%
0%
0%
To give a review, you need to login first.
LoginProduct Reviews
This product has no reviews.
Let others know what do you think and be the first to write a review.
Sold By
Verified Electronics
Positive Seller Ratings
100%
Ship on Time
100%
Seller Reviews
0
More Products From Them
Messages